
 For the longest time I was frustrated with images that came out discolored. Especially the white ones. That crispy snow scene or drawing on white paper always ended up gray. This is the one click solution for those who can't or don't want to become involved in more complicated photo manipulation gymnastics.
First, to understand what causes the problem. The camera can only make two adjustments--how long the shutter is open and how wide the aperture opens. Of all the metering and measuring of color and brightness of a particular scene, in the end the camera can only accept one setting for shutter speed and one setting for aperture. It ends up being a game of assumptions and averages. The typical decent photo is assumed to have so much light and dark, which averages a certain amount of gray. To properly replicate this "classic" gray there is one setting for shutter and aperture. The computer in the camera is programmed to calculate the proper setting from its sensor readings of a scene. The game goes awry when a scene is not typical in color or light. In the case of much white, the camera only knows to strive for an average gray, which pushes the white scene into grayness. Light sources cause the same problem. Camera sensors read natural light as cool and light bulb light as warm, but the problem is that the camera doesn't know when it is encountering which kind of light. This is the reason there is daylight and tungsten (light bulb) type films, and digital cameras have settings for inside and outside shooting.
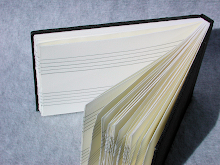
Try to use the camera's adjustments first and use photo editing software for clean up. Most photo programs have an auto adjustment feature, and this feature can solve the majority of problems with one or two clicks. In photoshop I think there is an auto levels, auto color, and auto contrast. In paintshop pro it is called one-step photo fix under the adjustment drop down menu. The above images are a before/after example of one click editing. Image on the top is rather warm because of incandescent lighting. The lower image has been edited and is a closer match to the wood's natural color and canvas backdrop. Now try these simple adjustments on your snow scenes, drawings on white, and objects sitting in front of light colored backdrops.
In a real hurry? Try using the camera's built in flash and see if you can live with the front-on lighting. Colors are usually accurate, because the camera is calibrated to the flash, so it knows what to expect.


good information, eb. thanks. i want to investigate the special "daylight light bulbs" too...maybe those would help with indoor photography.
ReplyDeleteI've tried verilux, halogen, daylight and photo flood lights. Still need to make an adjustment for the light that comes off the filament.
ReplyDeleteIf you do want to indulge in some photoshop gymnastics, one simple trick you can use is the "Color Balance" sliders under the Image ->Adjustments menu - if the picture is too warm and yellow, slide the slider towards cyan on the Cyan-Red one and towards Blue on the Yellow-Blue one. This quickly fixes most incandescent light problems I've had, if your "auto levels" isn't doing a very good job.
ReplyDelete